

How To Record A Screen On Windows
How to Screen Record in Windows 10 or Windows 11
If a pic is worth a yard words, so a video is worth a million. Whether you're showing someone how to perform a task in an important application or you want to bear witness off your gameplay, screen recording in Windows is a great way to practice information technology.
Fortunately, both Windows 10 and Windows 11 have screen recording built right in as part of the Xbox Game Bar tool, and using information technology is extremely like shooting fish in a barrel, even if y'all want to capture your activeness in a not-gaming app. All the same, at that place are some limitations to Game Bar so yous may desire to use a 3rd-party app such equally OBS for screen recording if you're doing something more complex than just capturing one awarding at a time.
Below, we'll show yous how to tape your screen in Windows 10 or Windows 11, using both the Xbox Game Bar and OBS. If all you need is a all the same paradigm, run into our article on how to have a screenshot in Windows 11.
Record the Windows Screen with Xbox Game Bar
Built into both Windows 11 and Windows ten, the Xbox Game Bar has a number of features designed to amend your gaming experience, such as giving you quick admission to Xbox chat and a peek at your CPU and GPU activity. Yet, its most useful feature -- whether you are gaming or not -- is its power to screen record MP4 videos.
There is one drawback to using the Xbox Game Bar to screen tape: It simply works within a single application at a time and cannot capture the Windows desktop or File Explorer. So, if y'all desire to bear witness someone how to practice a task involving multiple programs -- for instance, programming a spider web page in a code editor so viewing information technology in a browser -- you would need to catch multiple videos. And if you want to show them how to do anything in the Windows 11 or ten UI, such equally using the Start menu, you can't. For those activities, you should use another tool such equally OBS, which we'll bear witness you lot how to screen record with later in this article.
1. Click into the app yous wish to record.
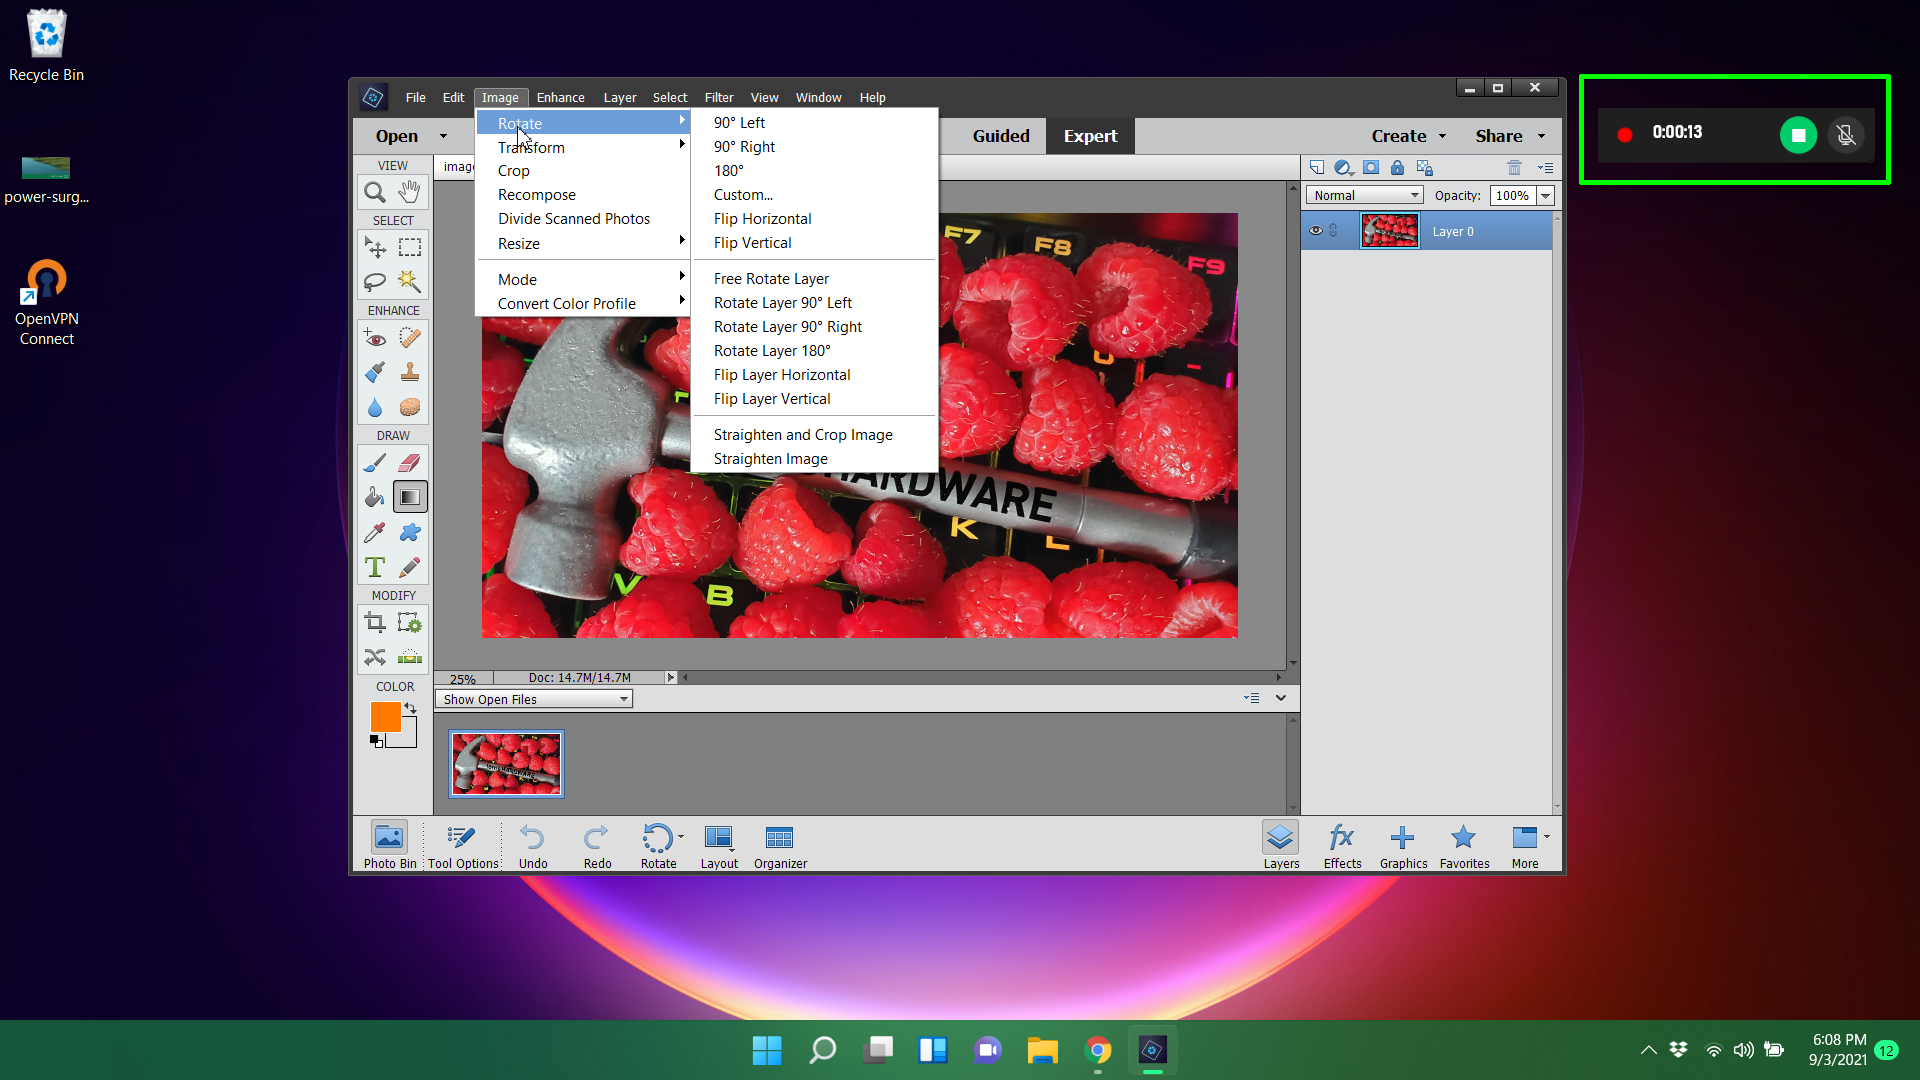
ii. Hit the Windows Key + Alt + R to start screen recording. A small recording widget showing how long you've been recording appears somewhere on the screen, virtually probable in a corner. You lot tin can too get hither by launching the Xbox Gamebar (Windows Fundamental + One thousand) and and then finding the capture widget, but the keyboard shortcut is much simpler.
3. Perform whatever deportment you lot want and apply your microphone to record audio. Y'all can also mute the mic if you don't desire to capture any audio.
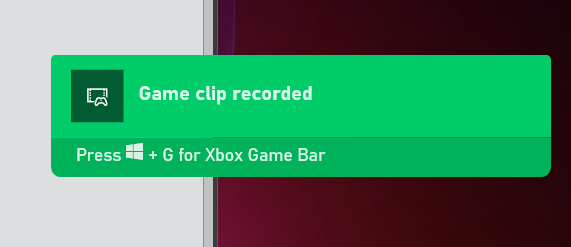
iv. Hit the Windows Key + Alt + R once again to stop screen recording. Yous tin also hit the stop push on the widget You will get an alert that says "Game clip recorded. If you click on it, you will get into the Gallery department of the Gamebar app and exist able to preview the video you captured. You lot tin can likewise observe the MP4 file you recorded under your Videos/Captures folder.
Configuring Xbox Gamebar Screen Recording
While the default settings are probably fine for most people, at that place are a few options you can change.
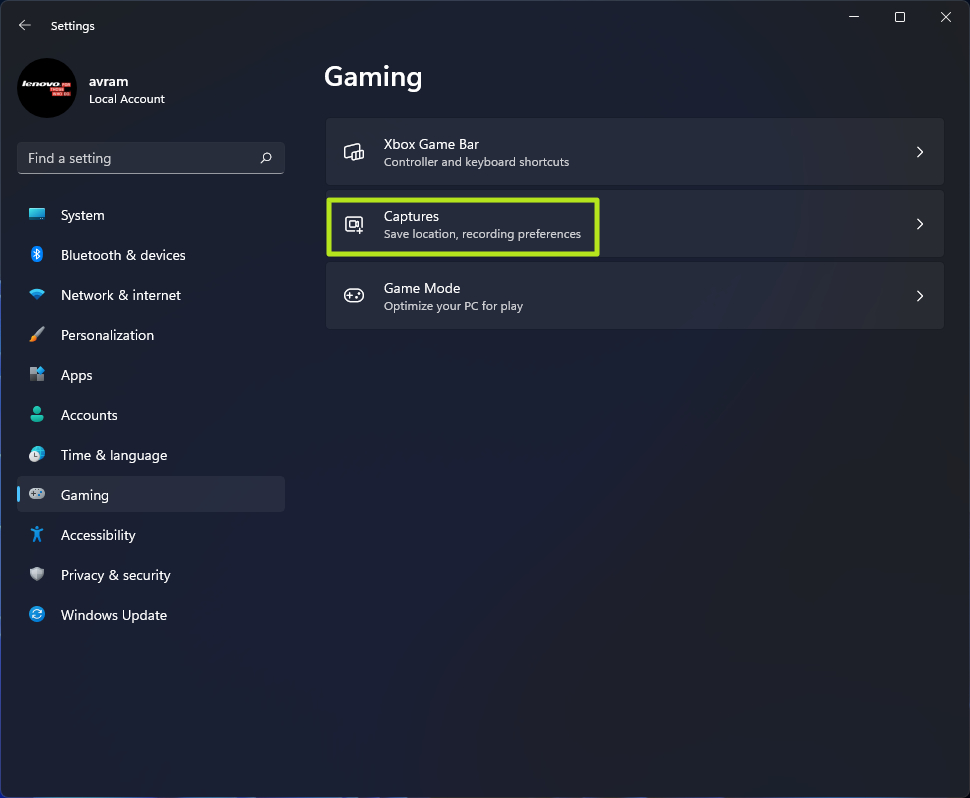
one. Navigate to Settings->Gaming->Captures.
2.Change any of the following settings. Notation that though they use the discussion "game," the settings should employ to any app you tape whether it's a game or not.
- Record what happened (Win eleven) / Background Recording (Win x): this creates a 30-2d (or greater if you change the settings) buffer of automatically recorded content. So if yous are playing a game and just had an epic kill, yous tin hit Windows fundamental + G to launch game bar and yous can salvage the xxx seconds that merely passed, even though you weren't actively screen recording it. Note that the name of this setting is different in Windows xi than 10, but the characteristic is the same.
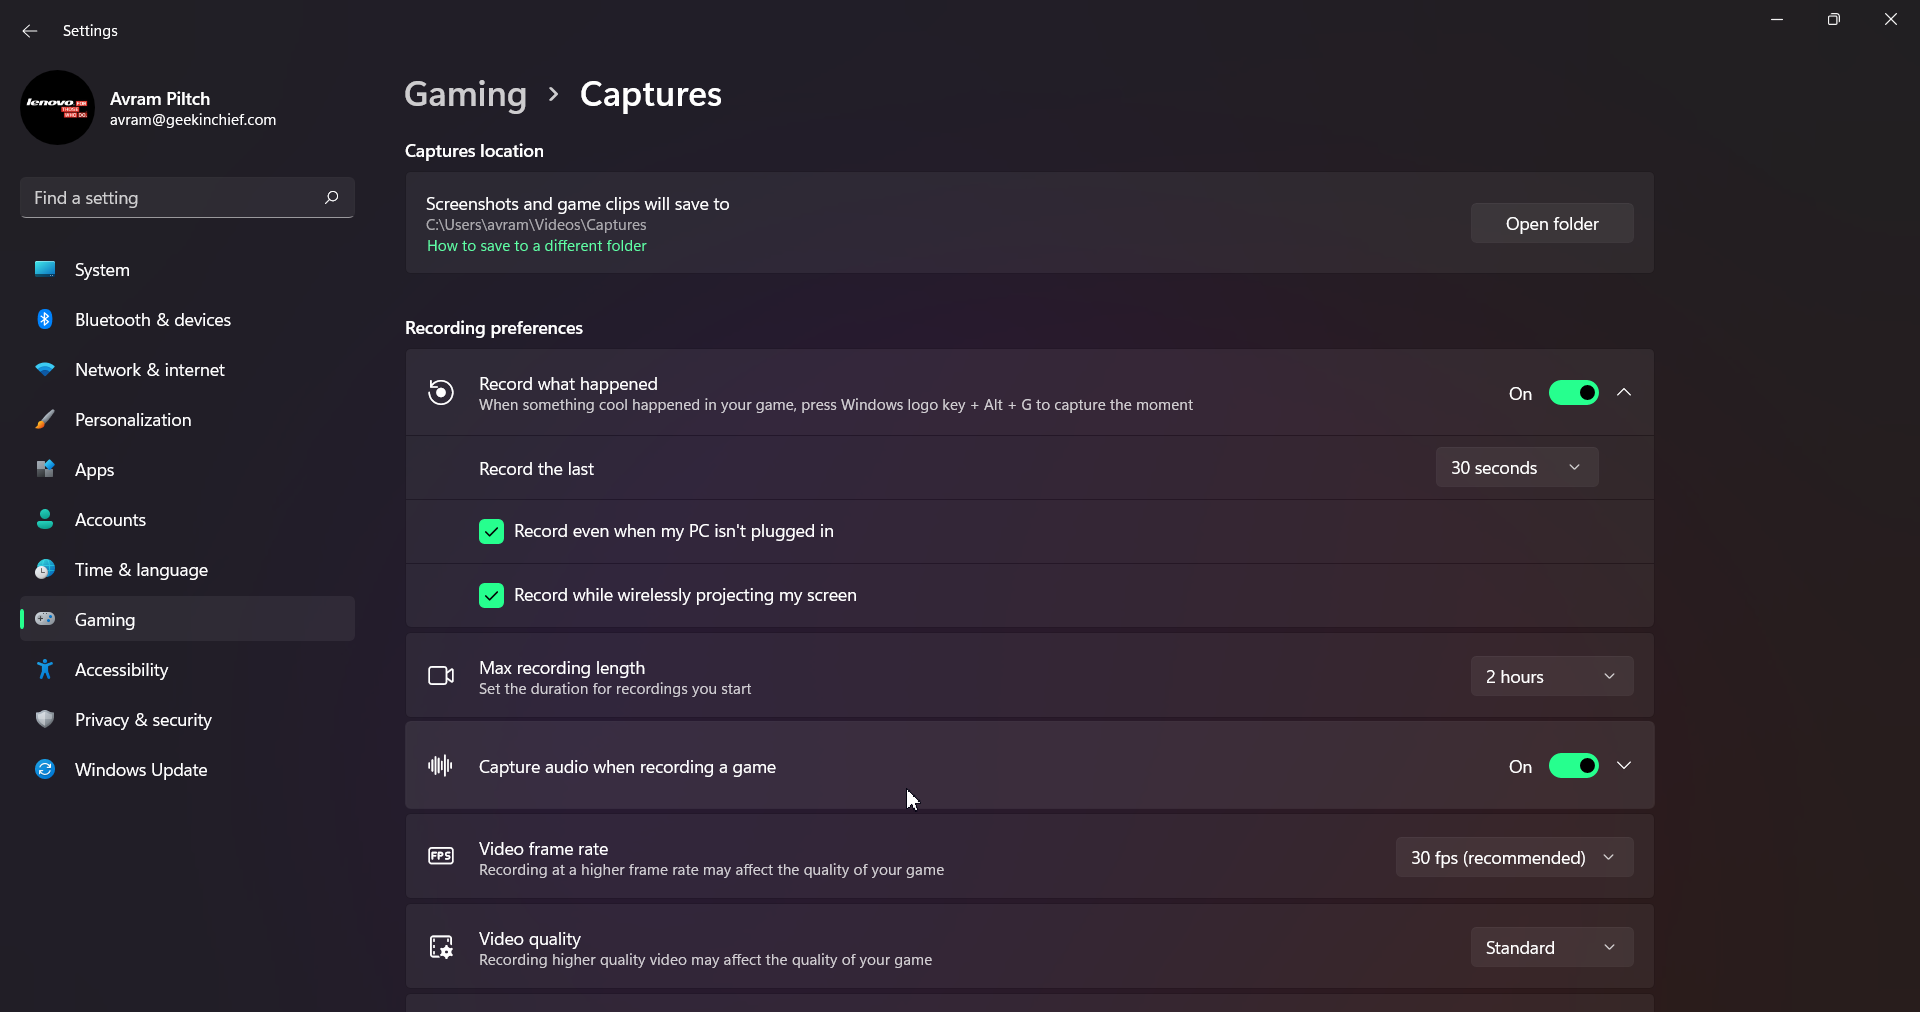
- Max recording length: The amount of time after which screen recording volition automatically close off. I recommend leaving this at the default two hours.
- Capture audio when recording a game: By default, this records the sounds from your mic and the game itself, simply excludes background sounds from Windows or your other apps. You can disable the audio recording entirely or enable it to record arrangement sounds or change the balance.
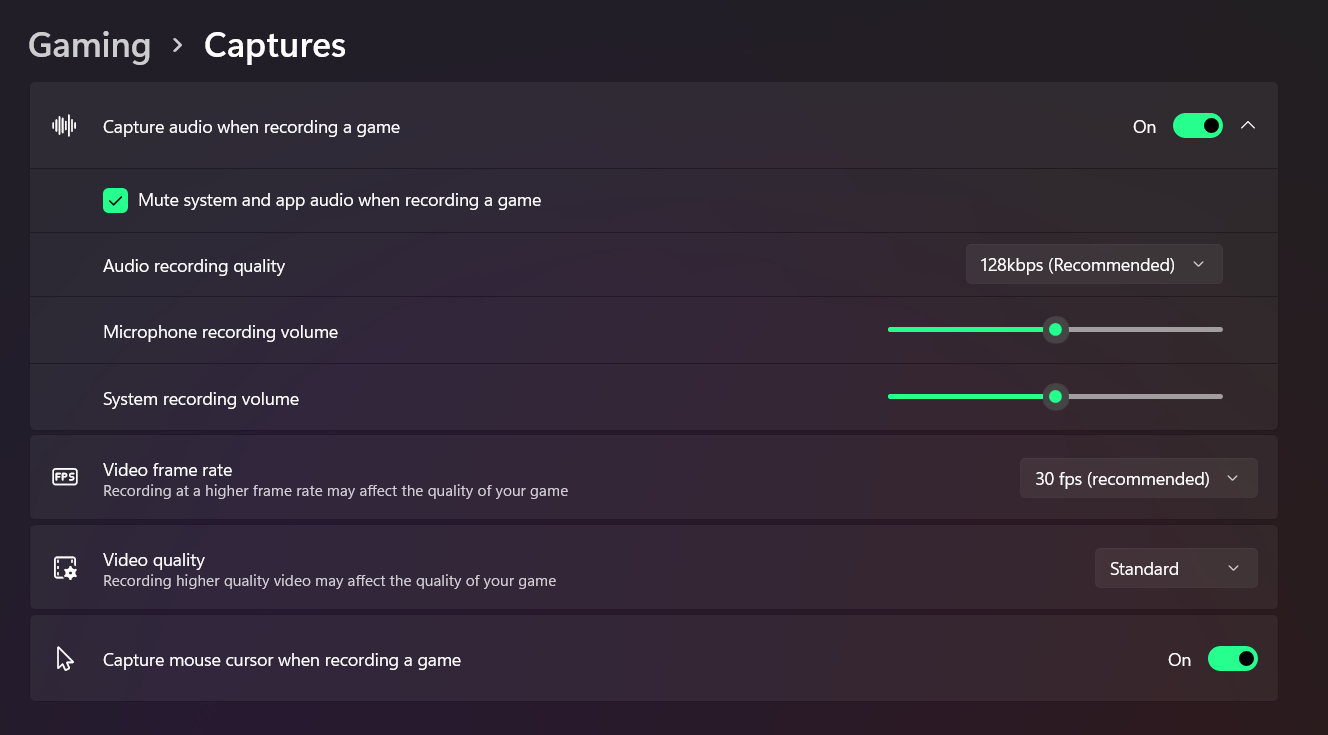
- Video frame charge per unit: defaults to xxx fps, but you can alter it to lx fps.
- Video quality: choose standard or high.
- Capture mouse cursor when recording a game: I recommend leaving this enabled, specially if you lot are recording an app that is not a game.
Recording the Whole Screen with OBS Studio
The biggest drawback to using Windows 10's or Windows eleven'southward congenital-in Xbox Gamebar to screen tape is that it can only piece of work with one app at a time and volition not evidence the Windows desktop or File Explorer. To capture your entire desktop and all the windows on it, you need a third-party app and, while in that location are many, we like OBS Studio for this purpose.
OBS Studio is very popular in the game streaming community because information technology's free and peachy at broadcasting games out to Twitch and other sites. However, yous can also employ OBS to record the entire screen in Windows 11 and save it as an MP4 file, without ever streaming what you do.
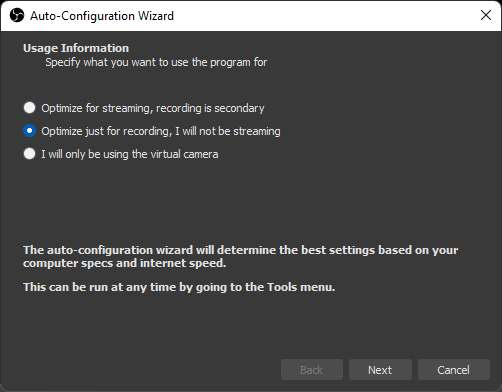
one. Download, install and launch OBS Studio. When y'all launch OBS for the first fourth dimension, if you haven't already, you will be asked whether you want to optimize it for streaming or recording just. If you don't program to stream, choose "Optimize just for recording."
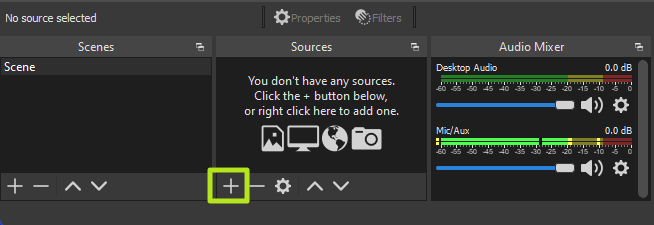
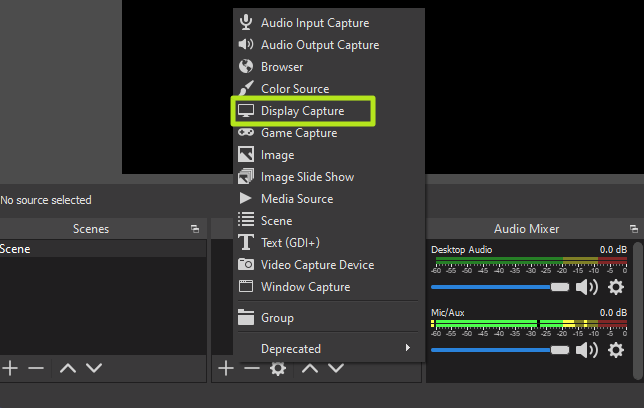
2. Click the Plus icon under Sources to add a new source.
3. Select Display Capture.
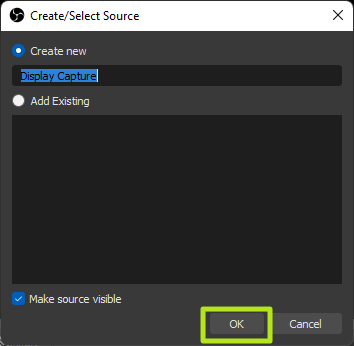
iv. Click Ok on the dialog box that pops up. You lot can give the source a proper noun other than Display Capture if you'd similar.
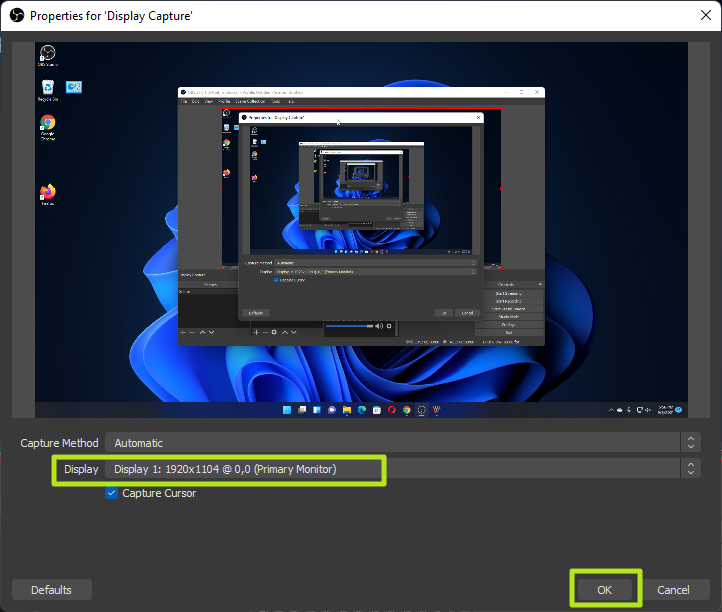
five. Choose a display and click Ok. If yous have more than one monitor, this would permit you to have OBS on 1 screen while recording the action on another. If you have simply one monitor, there'south just i choice.
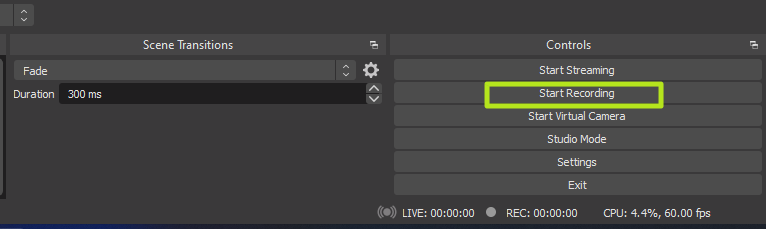
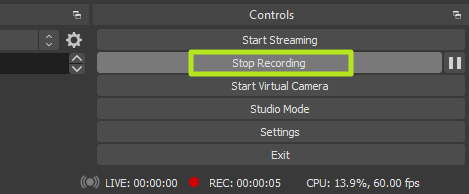
vi. Click the Start Recording push in the lower right corner of the screen.
vii. Minimize OBS if you are screen recording from the same monitor that OBS is on.
8. Click Stop Recording in OBS when yous are finished.
By default, your screen recording videos volition be located in the Windows xi (or 10) Videos folder. They are stored, by default, in the .mkv file format. Withal, you can modify the output to MP4 or MOV files by going to the Settings->Output menu in OBS.

How To Record A Screen On Windows,
Source: https://www.tomshardware.com/how-to/screen-record-in-windows
Posted by: thompsonkimmilloof.blogspot.com
0 Response to "How To Record A Screen On Windows"
Post a Comment